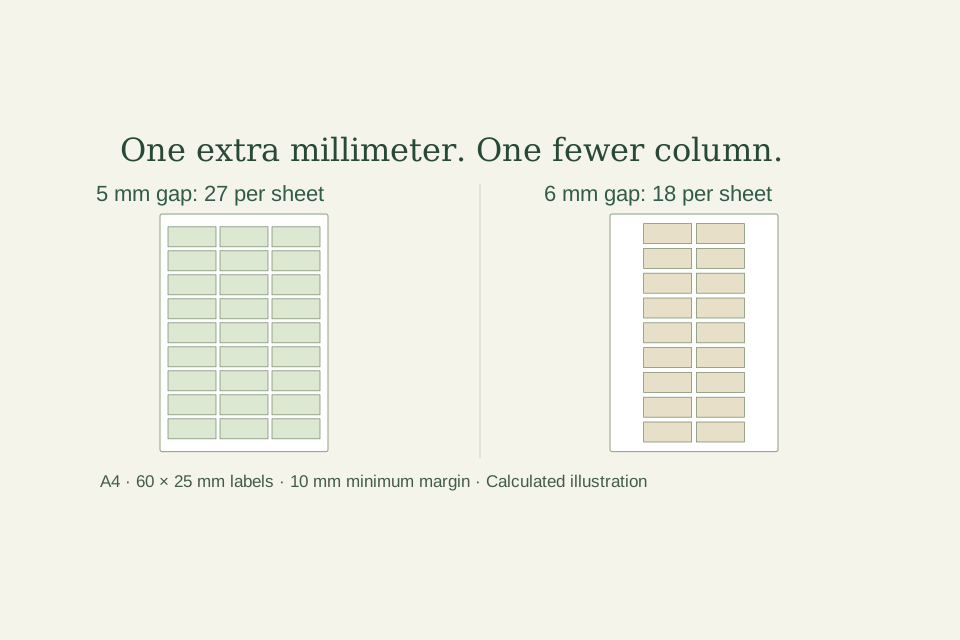
You add one millimeter of cutting space, and the layout suddenly has nine fewer labels. The labels did not get bigger. The paper did not change. The gap crossed a fit threshold: three columns no longer fit inside the reserved margins.
Here is a reproducible case using 60 × 25 mm labels on A4, with a 10 mm minimum margin. At a 5 mm gap, the tool fits 3 columns × 9 rows = 27 labels per full sheet. At a 6 mm gap, it fits 2 columns × 9 rows = 18. An order of 27 labels goes from one PDF page to two.
What we checked: on October 15, 2026, we entered both cases in the live Swetter tool, downloaded both PDFs and independently checked the page boxes, label rectangles, positions and text counts. The screenshots show real tool operation; the PDF previews are rendered from those downloaded files. No physical printing was performed.
Change just one setting
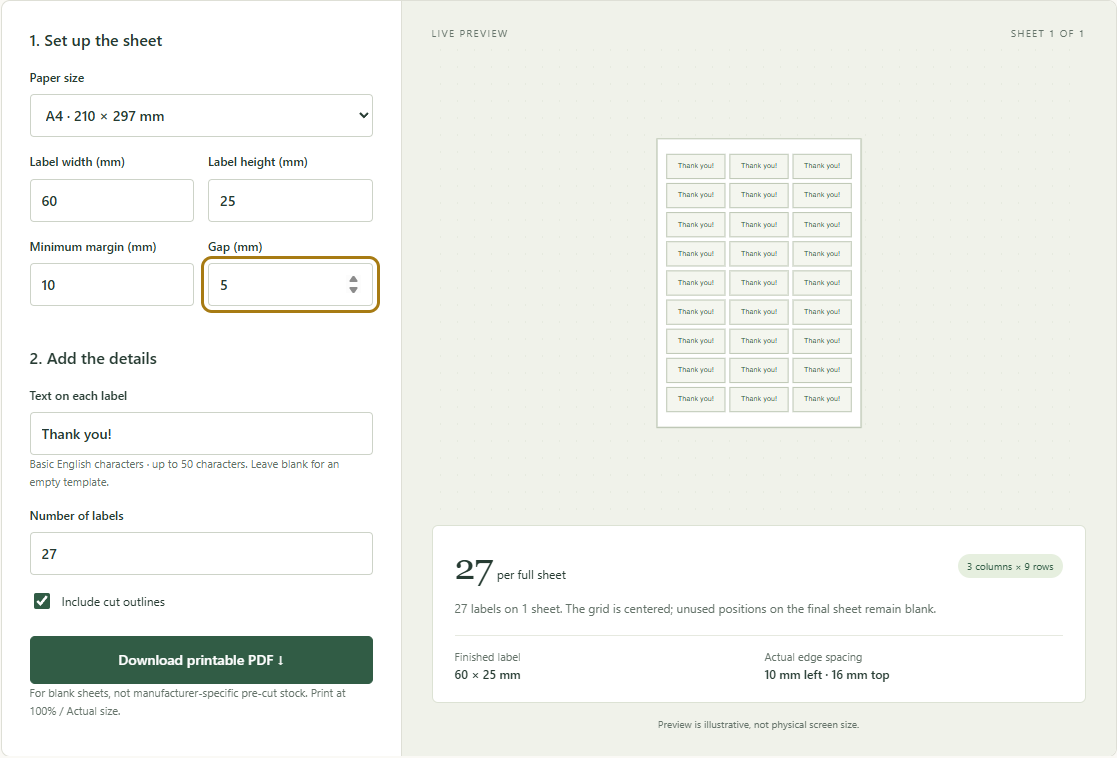
Open Label & card layout. Keep these values fixed, then change only Gap (mm) from 5 to 6.
| Setting | Value |
|---|---|
| Paper | A4, 210 × 297 mm |
| Label width | 60 mm |
| Label height | 25 mm |
| Minimum margin | 10 mm |
| Text on each label | Thank you! |
| Number of labels | 27 |
| Include cut outlines | Checked |
| Gap, first run / second run | 5 mm / 6 mm |
This is a regular-grid layout for blank sheets you cut yourself. It is not a template for a named pre-cut label product. The same gap applies horizontally and vertically; the tool does not offer separate settings for the two directions.
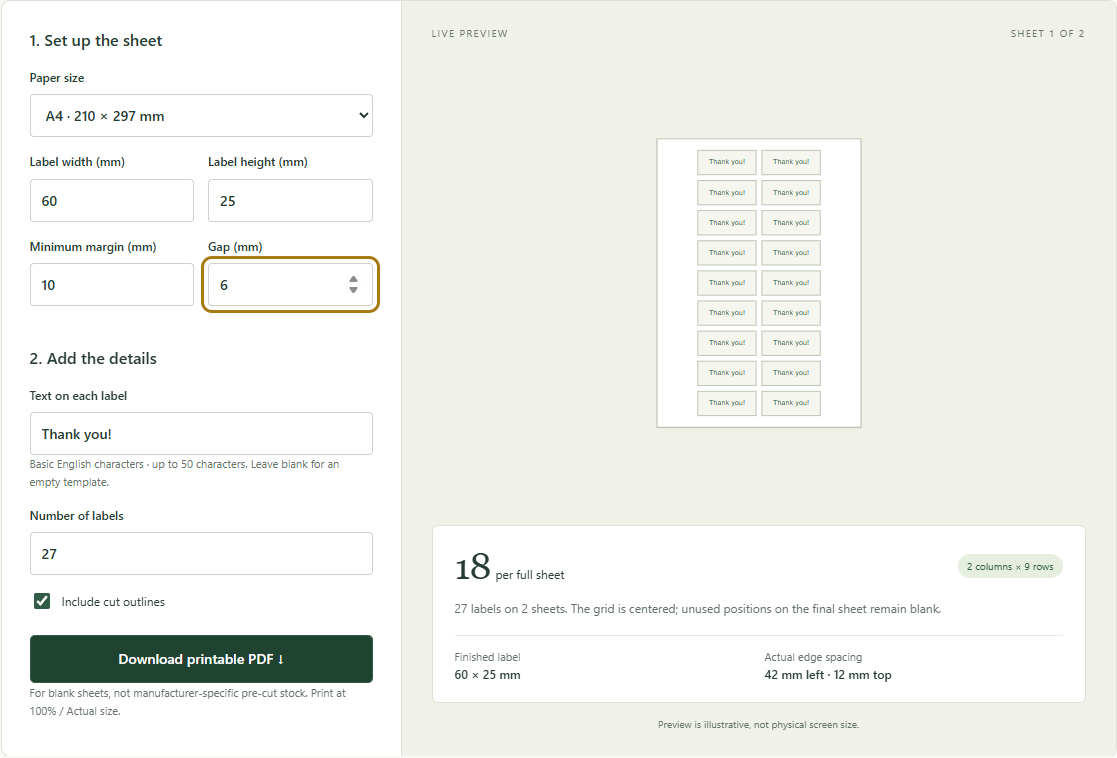
The missing column is explained by two gaps
The horizontal budget after the minimum margins is:
Available width = 210 - 2 × 10 = 190 mm
Three labels contain two internal gaps, not three. At 5 mm, the occupied width is exactly the available width:
3 × 60 + 2 × 5 = 190 mm     fits
3 × 60 + 2 × 6 = 192 mm     exceeds the budget by 2 mm
Increasing each gap by 1 mm adds 2 mm across a three-column row. Once 192 mm is required, the tool cannot keep a partial third column. It falls back to two complete columns.
You can solve for the largest gap that preserves three columns:
3 × 60 + 2 × gap ≤ 190
gap ≤ (190 - 180) / 2
gap ≤ 5 mm
Five millimeters is therefore the exact calculated boundary for these inputs. This is a geometry limit, not a measured cutting tolerance. A layout that fits exactly on screen does not provide extra allowance for inaccurate paper, cutting or printing.
For the general column formula and the difference between gaps and margins, see the label-spacing guide.
Why the row count stays at nine
The vertical budget is 297 - 2 × 10 = 277 mm. Nine 25 mm labels fit at either gap:
- At 5 mm: 9 × 25 + 8 × 5 = 265 mm.
- At 6 mm: 9 × 25 + 8 × 6 = 273 mm.
A tenth row would require 295 mm at the smaller gap, or 304 mm at the larger gap. Neither fits the 277 mm budget. That is why this comparison isolates the column loss: the gap changes both directions, but the row threshold is not crossed.
| Result | 5 mm gap | 6 mm gap |
|---|---|---|
| Columns × rows | 3 × 9 | 2 × 9 |
| Positions per full sheet | 27 | 18 |
| Full grid width | 190 mm | 126 mm |
| Full grid height | 265 mm | 273 mm |
| Left and right edge space | 10 mm | 42 mm |
| Top and bottom edge space | 16 mm | 12 mm |
| PDF pages for 27 labels | 1 | 2 |
| Labels on each PDF page | 27 | 18, then 9 |
The 6 mm layout has a one-third lower full-sheet capacity. For this particular 27-label order, it needs one extra page. Other quantities may still fit on the same number of sheets; capacity alone does not tell you the final page count.
More side space does not mean the calculator wasted a column
The 6 mm grid is 2 × 60 + 6 = 126 mm wide. Centering it on 210 mm paper leaves (210 - 126) / 2 = 42 mm on each side.
Those wide margins can make the missing column look like a mistake. But inserting another 60 mm label also needs another 6 mm gap: the complete three-column grid would be 192 mm wide. The allowed width remains 190 mm.
Likewise, the vertical edge space changes because the nine-row grid grows from 265 to 273 mm. The unused height is split equally above and below it. The entered 10 mm margin is a minimum, not a fixed anchor for the first rectangle.
Inspect the exports, including the partly used second page
Both files below were downloaded through Download printable PDF. Their pages are A4, and every label outline is 60 × 25 mm. Independent inspection found the expected rectangle positions and dimensions within 0.001 mm of the intended coordinates, allowing for the PDF writer's rounding. That says nothing about physical printer accuracy.
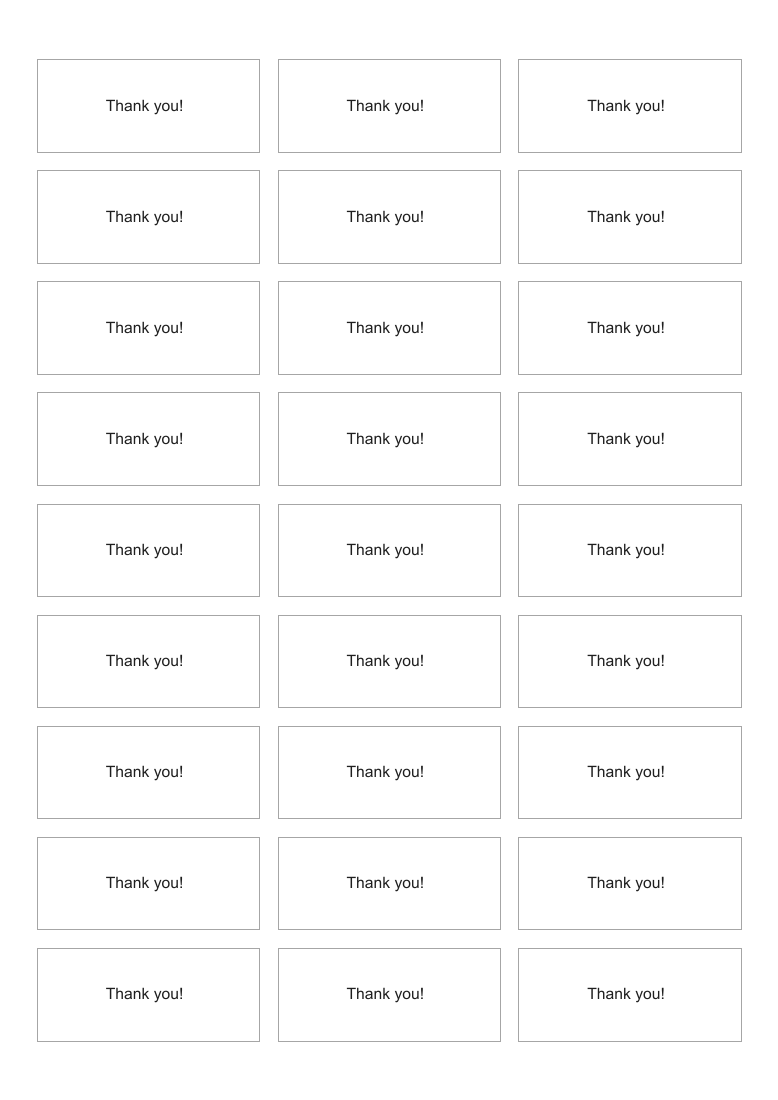
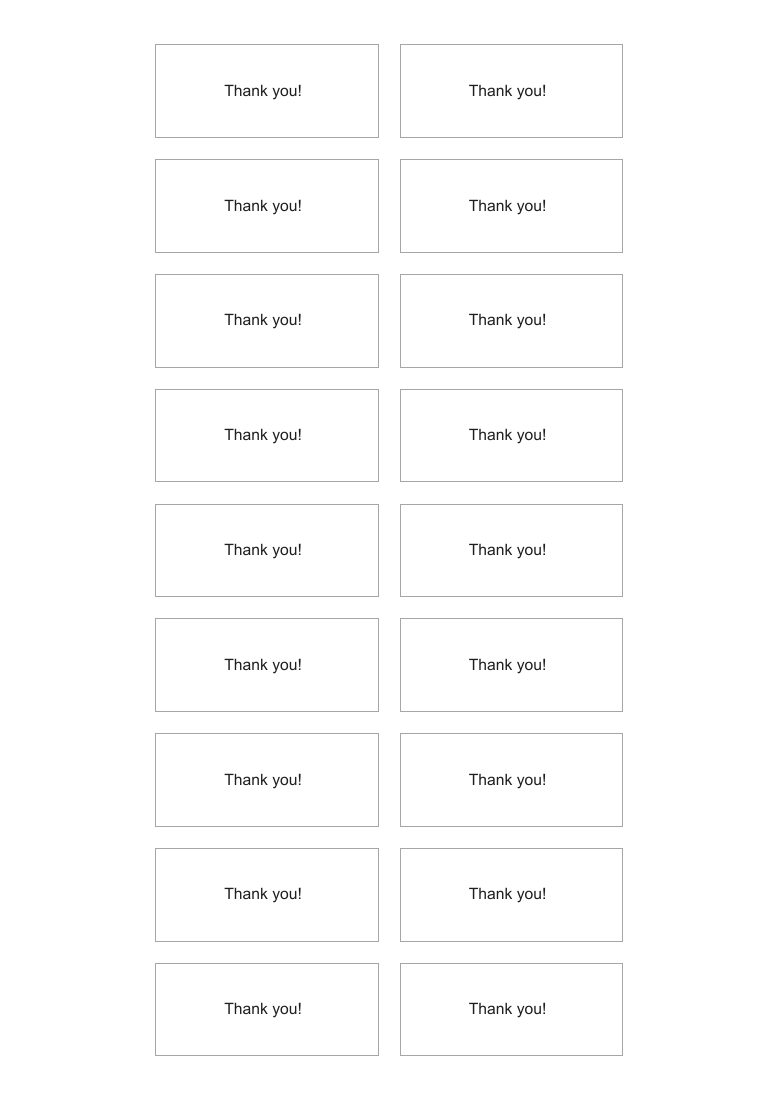
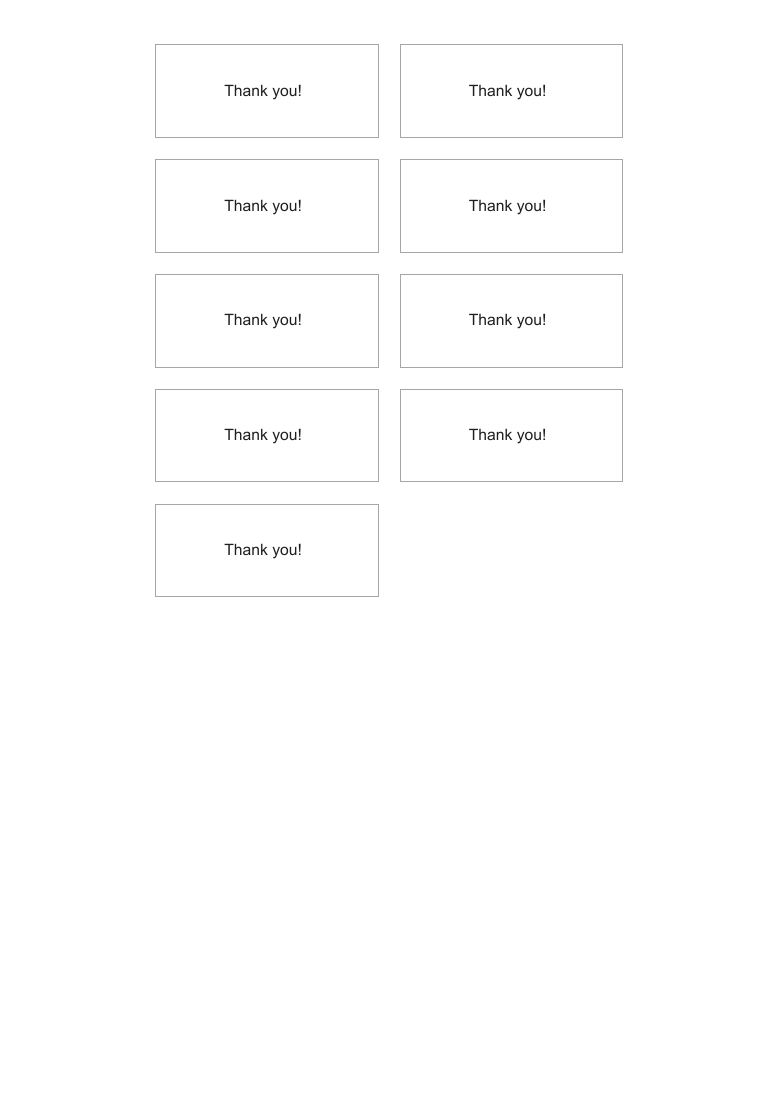
Download the checked files
- 5 mm gap: one-page A4 PDF with 27 labels
- 6 mm gap: two-page A4 PDF with 18 + 9 labels
- Calculation record for both layouts (CSV)
Use the PDF for a paper proof; the PNG images above are reading previews.
Choose which requirement can move
If 60 × 25 mm labels and a 10 mm minimum margin are fixed requirements, keep the gap at 5 mm or less to retain three columns. If a 6 mm gap is necessary for your cutting process, accepting the extra sheet is a valid choice.
There are two other calculated possibilities, each with a tradeoff:
- Reduce the label width. With 6 mm gaps and a 190 mm budget, each of three labels can be at most (190 - 12) / 3 = 59⅓ mm wide. A 59 mm width gives a 189 mm grid and 10.5 mm actual side margins. Check that your message and package still work at that smaller size.
- Reduce the minimum margin. Keeping 60 mm labels and 6 mm gaps requires a 192 mm grid. A 9 mm margin gives exactly 210 - 18 = 192 mm. Only consider this if your actual printing and cutting setup can support that edge clearance; the calculator cannot establish that for you.
Changing the number of labels only changes how many positions and pages are used. It does not change the grid's capacity. Also, shrinking the finished PDF at print time would shrink the label dimensions and gaps together, so it would no longer be the same 60 × 25 mm job.
Make the first paper proof a separate check
For the supplied files, select matching A4 paper and an unscaled output setting such as Actual size. Adobe documents that Actual size preserves scale, while Fit can resize pages to the printable area; see Adobe's page-sizing reference. Check the controls in your own application and driver.
Before printing a batch, measure one label's width and height, a horizontal gap, a vertical gap, and the grid's position on the page. At a 5 mm gap, the intended horizontal pitch is 65 mm and the vertical pitch is 30 mm; at 6 mm they are 66 mm and 31 mm. Pitch means the distance between corresponding edges of neighboring labels.
Record those measurements only after making the proof. Our first-sheet check has a downloadable 100 mm reference if you also want a larger scale check. This article establishes why the layout count changes and what the exported files contain; the paper proof establishes what your printer actually produces.