A print preview can look correct while the paper result is slightly too small. Before sending a batch of labels, cards or pattern pieces, use one known measurement to check the settings. We made a simple A4 reference PDF containing a centered 100 × 100 mm outline square, so you can start with a file whose geometry has been checked.
What we checked: Swetter generated the PDF in a desktop browser on October 12, 2026. We inspected its page box and vector rectangle and rendered the file. No printer has been used for this article. The measurement examples below are hypothetical diagnostic results; the download is a reference for your own paper test.
Download the reference and check its purpose
A4 reference sheet
Open the one-page 100 mm square PDF
Use A4 paper, 100% / Actual size, one page per sheet and no borderless expansion. Print from the PDF, not from this article or its screenshot.
The file has one A4 page, 210 × 297 mm, and one square. Its outline centerlines are 100 mm apart horizontally and vertically, within 0.001 mm of PDF coordinate rounding. The square is centered: 55 mm from the left page edge and 98.5 mm from the top page edge.
This is a basic size and placement reference. It is not a certified measuring instrument, a color calibration target or a full printer alignment test. It cannot tell you how a different PDF application's settings will behave. Always test the final project too.
Recreate the file in the tool
In Label & card layout, select A4, set both label dimensions to 100 mm, set the minimum margin to 50 mm, the gap to 0 mm, and the quantity to 1. Clear the text field and leave Include cut outlines checked. The large minimum margin makes this a one-position grid.
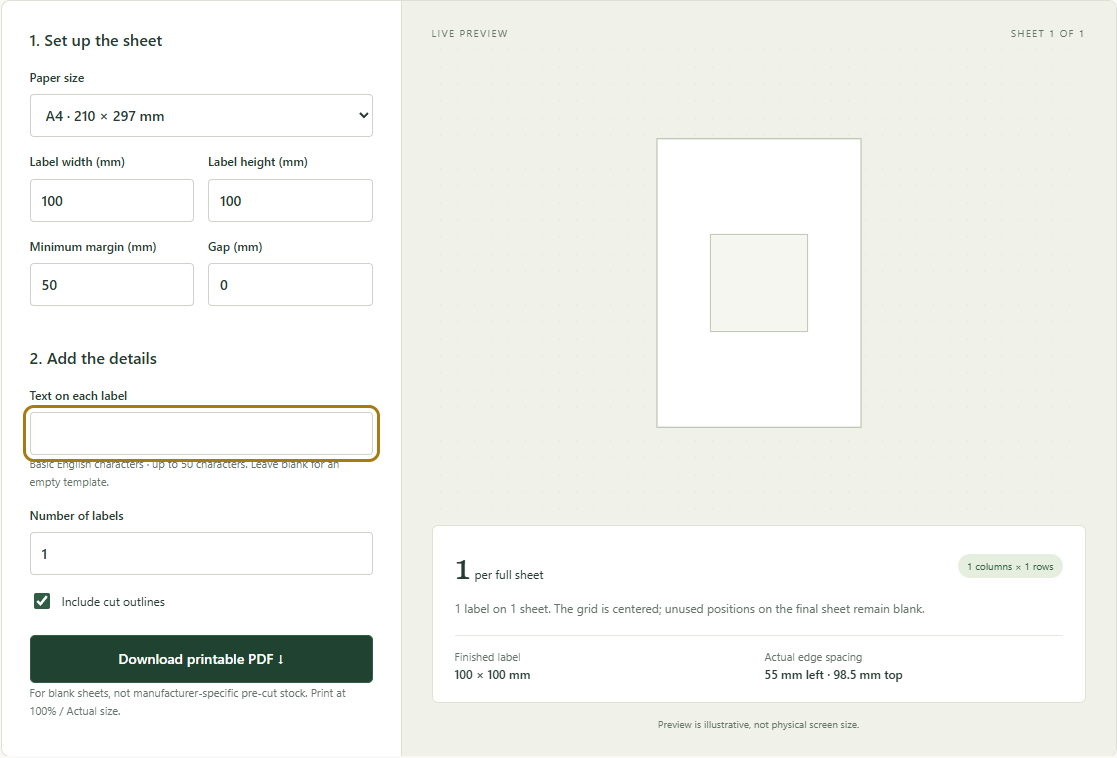
The rendered PDF preview shows the outline on an otherwise blank page. Its displayed size changes with your screen. Measuring the image on a monitor would not verify the PDF's physical size.
Print one sheet with a recorded setup
Open the PDF in the application you plan to use for the real job. Choose the printer and check that the destination paper is A4. Use 100% or Actual size, one page per sheet and the normal portrait orientation. Inspect both the application's controls and the printer's properties for an additional scale or borderless setting.
Adobe's page sizing documentation distinguishes Actual size, which preserves scale, from Fit, which sizes a page to the printable area. A setting name alone does not verify the output. Record what you chose, then print the single sheet on ordinary paper.
If you have only Letter paper, this particular centered square is well inside the page edges, but the document remains A4. Check the preview and use 100% rather than fitting the whole A4 page. The resulting page-edge offsets depend on the application's placement. For a reliable placement test, use matching A4 paper.
Measure both directions and interpret the result
Use a ruler with millimeter markings. Measure the horizontal and vertical distances between the centers of the outline strokes, keeping the ruler aligned with each edge. Note the measurements before changing any settings. If your ruler cannot resolve a small difference, record the reading as approximate instead of inventing precision.
The scale estimate is measured length ÷ intended length × 100. A 100 mm reference makes the arithmetic easy: a width of 95 mm corresponds to approximately 95% of the intended width.
| Hypothetical paper measurement | What it suggests | Next useful check |
|---|---|---|
| 100 mm wide and 100 mm high | This reference is approximately at its intended scale | Check placement, then print the actual project |
| 95 mm in both directions | A consistent reduction to about 95% | Check Fit, Shrink and driver scaling |
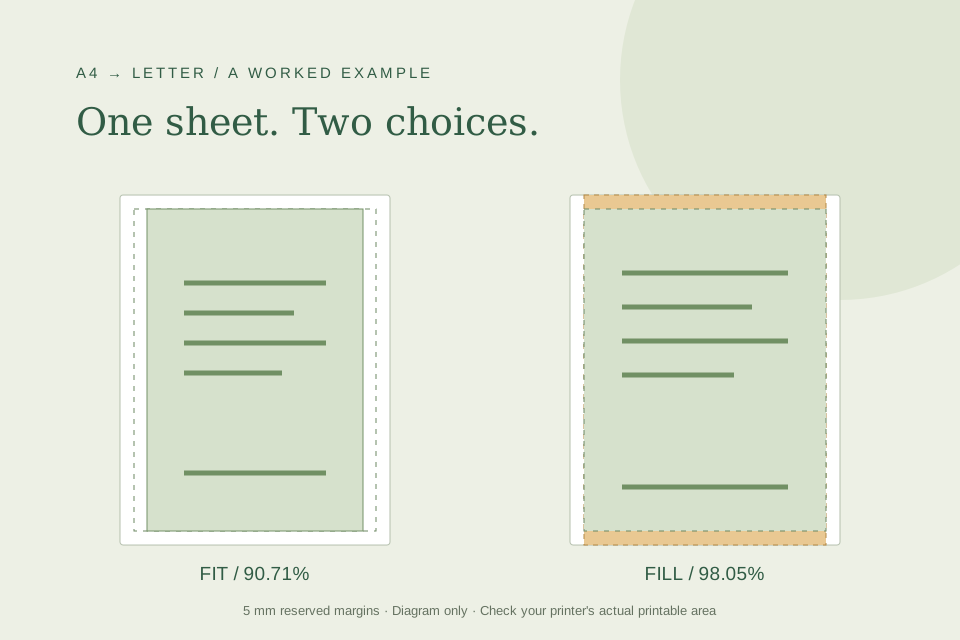
| About 90.7 mm in both directions | Similar to the modeled A4-to-Letter fit with a 5 mm margin | Check paper selection and any custom scale |
| 100 mm wide but 98 mm high | The two axes disagree | Repeat the measurement, verify the file and review the printer's own troubleshooting guidance |
| Correct size but shifted on the page | Scale and placement are different questions | Check centering, margins and paper feed |
A symptom does not uniquely identify its cause. Change one setting at a time and print another single sheet, keeping the earlier proof labeled for comparison. Avoid compensating by changing the design's dimensions before you understand the scale problem.
Check the real project and keep a short record
When the reference is correct, print the first page of the actual project with the same application and relevant settings. Inspect a known dimension, the outer content, spelling and page selection. For our 30-label example, measure both an upper and lower 50 × 30 mm label and check the 4 mm gaps. A square reference alone cannot verify every label position.
Keep this record alongside the PDF:
| Record | Fill in after your own test |
|---|---|
| File and page | Exact filename and selected page |
| Equipment | Printer model and application/version |
| Paper and settings | Paper size, orientation, scale and driver changes |
| Measurements | Horizontal and vertical size; placement if relevant |
| Evidence | A sheet photo and close-ups with the ruler aligned to both axes |
| Decision | What was acceptable, or what you will change next |
Repeat the check after changing the file, application, printer, paper or a relevant driver setting. A measured proof is evidence for that particular setup. It does not guarantee identical behavior across other printers or materials.